
How to Remove Shadows, Sharpen Text and Enhance your Scans?
DocScan automatically improves your scans by cropping, correcting perspective, and applying color enhancement. You can further fine-tune your scans to remove shadows, sharpen text, and improve clarity using the adjustment tools.
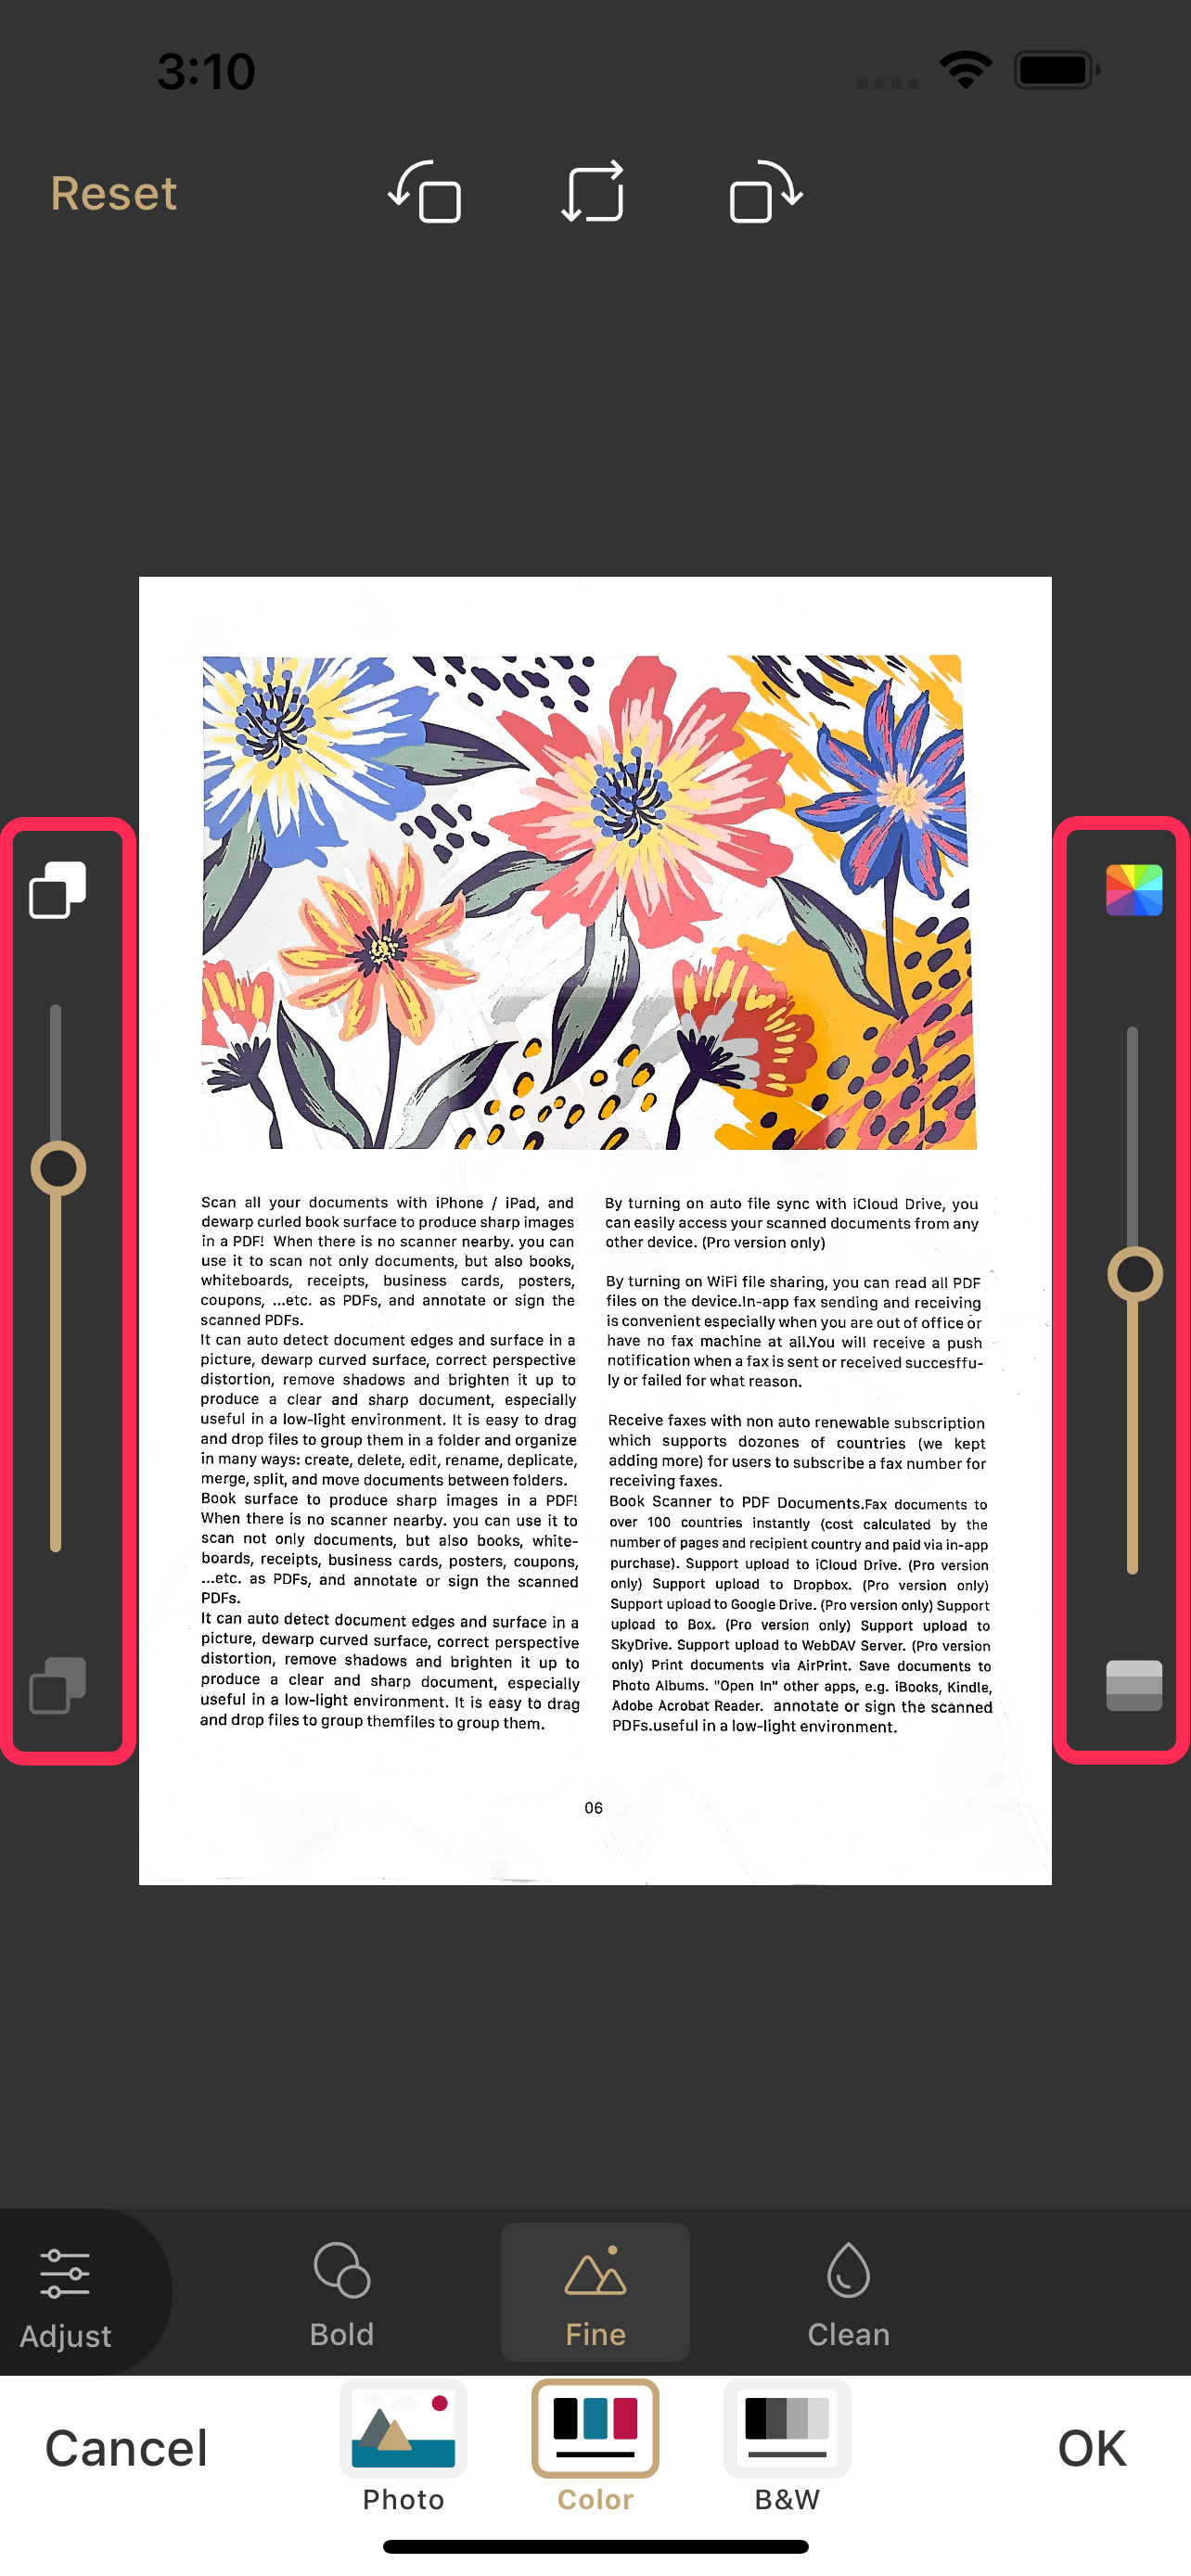
➊ Choose a Color Mode
After scanning, go to Image Editing. Use the bottom toolbar to switch between color modes:
- Photo: Keeps the original appearance — ideal for photos or drawings
- Color: Enhances color and contrast — great for forms, receipts, or diagrams
- B&W: Converts the image to pure black and white — best for documents with text
The bottom preview image shows the current enhanced result in real time.

➋ Pick an Enhancement Method (For Color & B&W only)
Tap the bottom preview image or the “Edit” button to open the color editing screen.

🔸If you select Color or B&W, three enhancement options will appear:
- Bold: Produces high-contrast, bold text, but the shadow removal effect is weakest. — perfect for scanned text
- Fine: Keep more details in picture regions. The shadow removal effect is next strong. — good for diagrams or detailed images
- Clean: Reduces strong shadows — recommended when scanning under uneven lighting


➌ Fine-tune the Image
-
Use sliders to adjust Brightness, Shadow Removal Level, or Saturation.
-
If you selected Color or BW, tap the
Adjustbutton at the bottom left to access the full adjustment panel.
Available adjustment tools include:


✅ Tap OK to apply the adjustments and return to the scan preview screen.
➍ Save Your Enhanced Scan
Once you're satisfied with the result, tap the Done button (bottom right) to save your scan.

Tips
- Scan in a well-lit environment to reduce natural shadows.
- Make sure your hand or phone does not block the light source during capture.