
Scan a Document: Quick Start Guide
To scan a document in DocScan, follow these simple steps:
-
Start scanning
Open the app and begin a new scan. Once the scan is captured, the processing screen will appear.

-
Edit the document boundary
Tap the top image to adjust the detected boundary.
Top image: shows the auto-detected document edges
Bottom image: shows the cropped and enhanced result that will be saved

-
Choose a color mode
Use the toolbar at the bottom to select a color mode:
You can switch modes if the result doesn’t look right. The bottom image updates with your selection.


|
|
Photo | Keeps the original appearance — ideal for photos or drawings |
|---|---|---|
|
|
Color | Enhances color and contrast — great for forms, receipts, or diagrams |
|
|
B&W | Converts the image to pure black and white — best for documents with text |


-
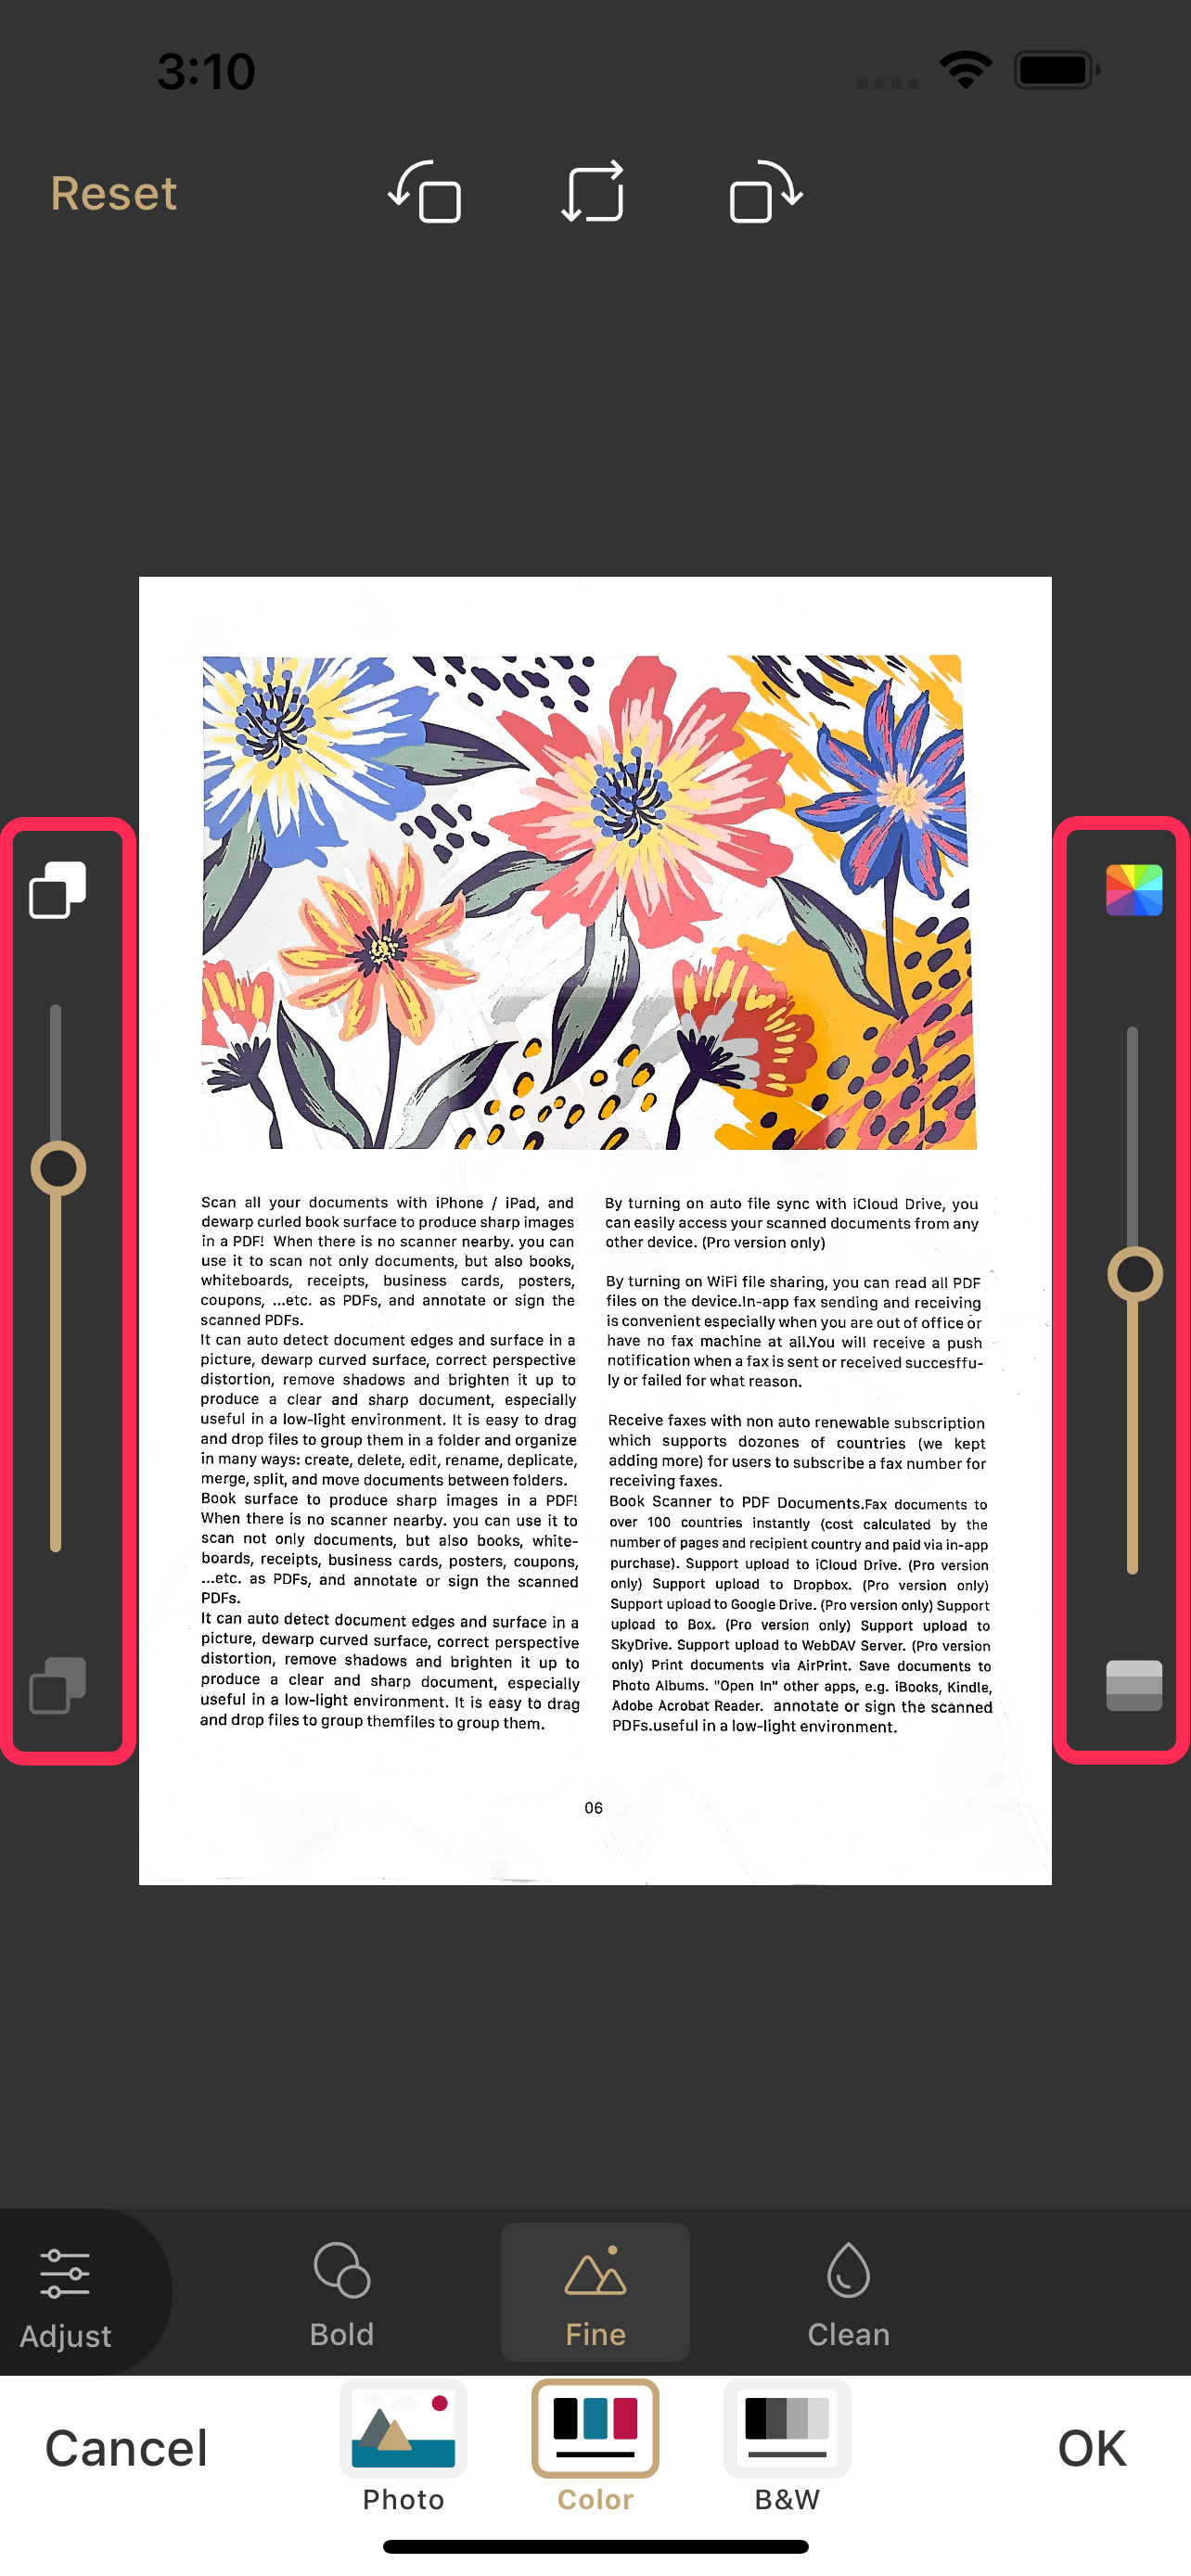
Fine-tune the result (optional)
Tap the small image or "Adjust" to enter detailed editing.

Choose an enhancement style: Bold, Fine, or Clean (available for Color / B&W)

Use the left slider to reduce shadows
Use the right slider to adjust saturation
When you're done, tap "OK" to apply changes.


-
Save your scan
Tap "Done" to save the scanned document.

