
How to Scan a Color Document?
Follow these simple steps to scan and enhance color documents quickly and accurately.
➊ Choose an Import Source
Tap the + button on the home screen to start a new scan.

Then, select your input method:
- Camera: Use your camera to take a new picture
- Photo: Import from your local photo library
- Files: Import from Files app and cloud services (Google Drive, OneDrive, Dropbox, etc. — Bronze subscription required)

✅ After taking a photo or selecting an image, tap the thumbnail in the bottom-right corner to proceed to the scanning steps.

➋ Preview Your Scan
After capturing or importing the image, you'll see the preview screen with two images:
- Top Image: Shows the detected document boundary (orange outline).
- Bottom Image: Shows the cropped and enhanced result that will be saved.
➌ Edit Document Boundary
Method (1) Drag the orange corners to fine-tune the document edges

Method (2) Tap the top image to enter boundary editing mode.
And drag the orange corners to fine-tune the boundary.


✅ Tap OK to apply and crop the image.
➍ Select Color Mode
-
Method (1) Use the toolbar at the bottom to choose a color mode:

|
|
Photo | Keeps the original appearance — ideal for photos or drawings |
|---|---|---|
|
|
Color | Enhances color and contrast — great for forms, receipts, or diagrams |
|
|
B&W | Converts the image to pure black and white — best for documents with text |


-
Method (2) Tap the bottom image to enter color editing mode.

Step 1: Choose a Color Mode : Pick a color filter from the toolbar.
Step 2: Choose Enhancement (Color & B&W only)
(Available only for “Color” and “B&W” modes. If “Photo” is selected, skip to Step 3.)
Select a processing style:

|
|
Bold | High contrast text, minimal shadow removal |
|---|---|---|
|
|
Fine | Preserves details, moderate shadow removal |
|
|
Clean | Strong shadow removal, good for uneven lighting |


Step 3: Fine-Tune the Image:
Use sliders to adjust:
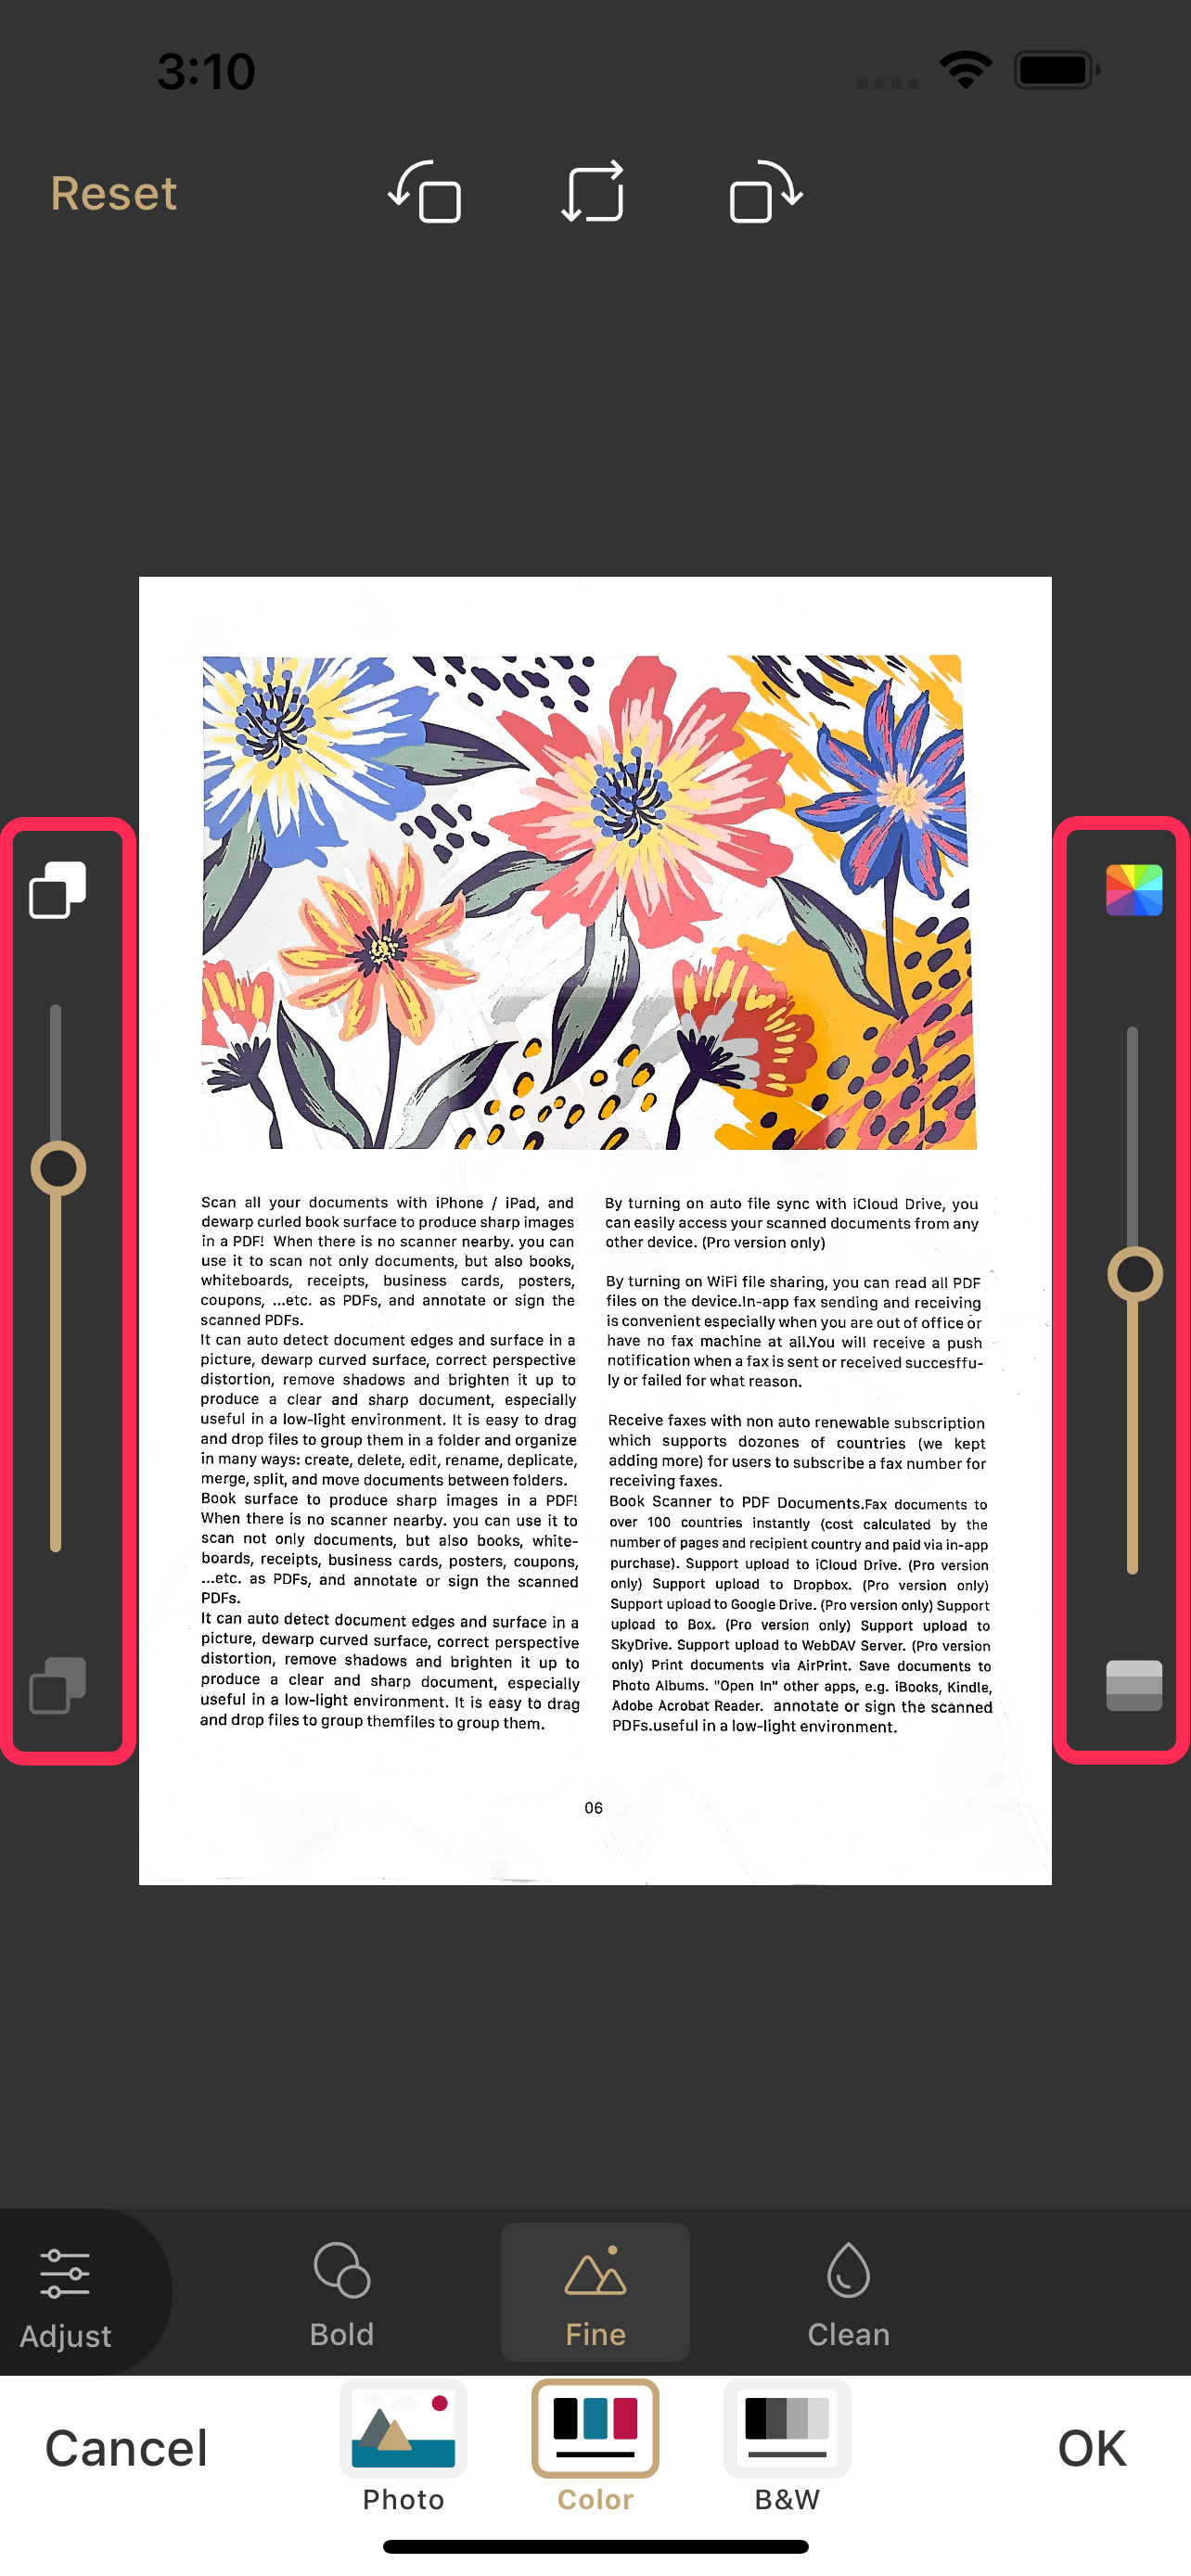
If you selected Color or B&W mode, tap the Adjust button in the bottom left corner to enter the the full adjustment panel.


✅ Tap OK to apply and return to the preview.
➎ Save the Document
Once everything looks good, tapDone (lower-right) to save your scanned document.

💡 Tips for Best Results
- Use bright, even lighting
- Avoid hand or phone shadows over the document